

Q1: How to upgrade?
A1:There are two ways to upgrade, WEB upgrade and ARFaceManager tool upgrade.
Note: when upgrading, be sure to check the firmware, the number in APP firmware name required to be used must be consistent with the APP number in the current product. For the current APP number, see the specific upgrade.
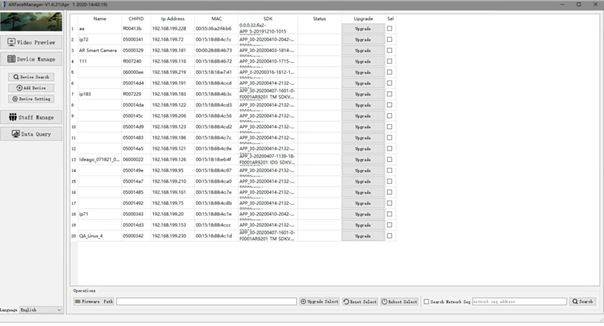
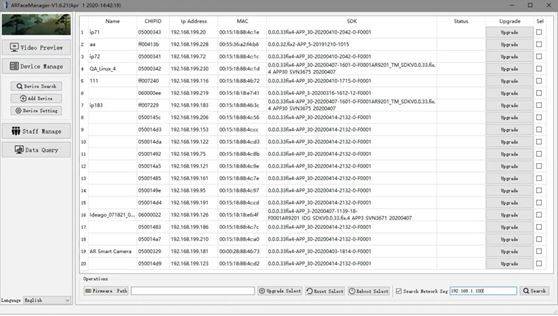
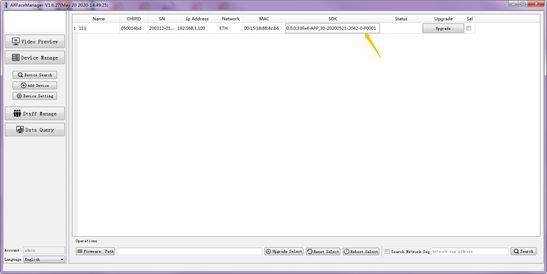
ARFaceManager tool upgrade: on the PC in the same network segment as the camera to be upgraded, run the ARFaceManager tool, on the “device management -> camera search” page, select the img file to upgrade through the “firmware address” button, click the search device button, find the camera to upgrade, click the corresponding upgrade button. You can also select multiple devices and click the “Upgrade Select Device” button to upgrade all selected cameras.
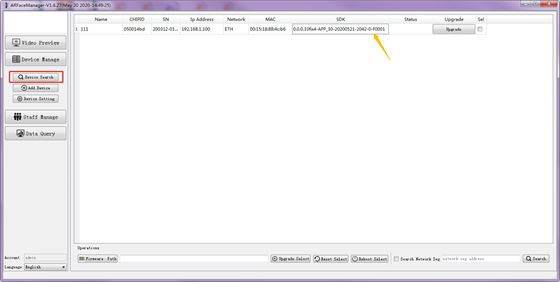
The current APP number is obtained through the ARFaceManager tool as shown in the figure below. The APP number corresponding to the following example is APP_30:
WEB upgrade: the default IP address of the panel machine is 192.168.1.100, use the PC, of the same segment to enter the correct user name and password in the IE browser, enter “configuration-> system-system maintenance “, select the img file to upgrade by browsing button, click upgrade, and select” ok “in the prompt restart dialog box that pops up to start the upgrade.
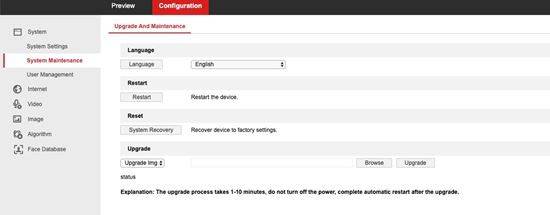
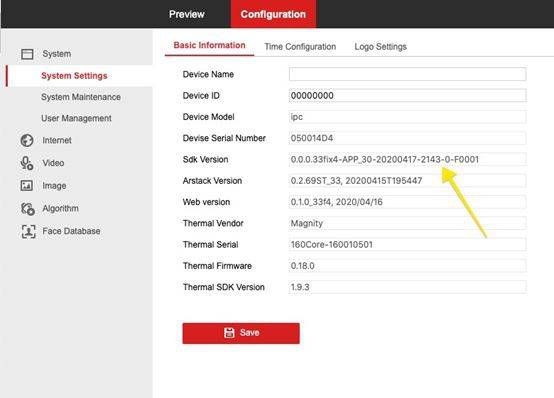
The current APP number is obtained by WEB as shown below. The APP number corresponding to the following example is APP_30:

Q2: How to use ARFaceManager tools to search panel devices?
A2: tools support multicast and unicast two ways to search devices, the default multicast mode. The unicast search device can be enabled when some multicast is disabled and the camera IP and PC IP are in the same network segment (e.g. the camera and PC are connected to a router with the same disabling multicast function), as follows:
Note: Use a firewall that needs to be disabled on Windows win10 computer.
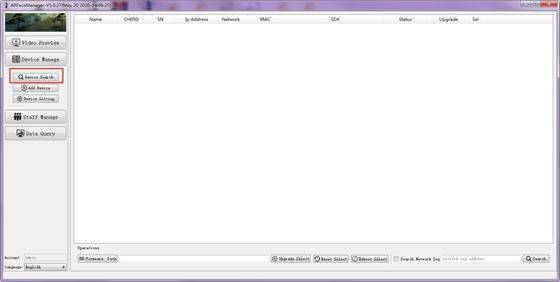
(1) Multicast search device: run the ARFaceManager tool, in the “device management ->camera search” page, click on the “search device” button can be as follows:
(2) unicast mode search device: run ARFaceManager tool, on the device management -> camera search page, tick the search specified network segment selection box, and enter the camera device IP address network segment information in the edit box in the same format as the IP address format, take the camera device IP address 192.168.199.192 as an example, enter 192.168.199.1 in the edit box. Then click the “Search Device” button, as shown below:
Q3: How to register face to device database?
A3: there are two ways to register face to device database, web way and ARFaceManager tool registration.
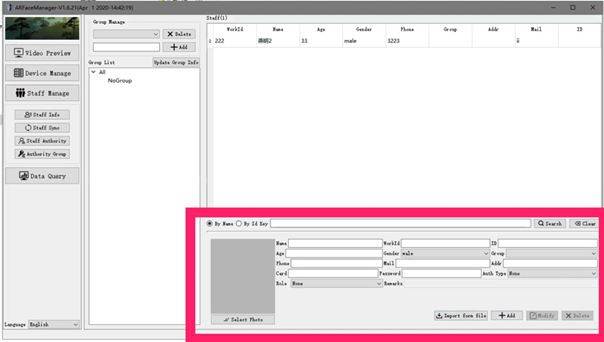
(1) ARFaceManager tool registration: run the ARFaceManager tool, under the “personnel management” option, as shown below, use the function in the “personnel management” page to add the personnel information to the ARFaceManager tool local database, and then synchronize the personnel information to the panel machine device end through the function in the “staff synchronization” page. For “staff management” and “staff synchronization “, see “AITP04 user manual. doc” document “Staff sync” section.
(2) WEB way to register: login camera, enter the Configuration -> Face Database ” page, you can add face information to the panel machine database on this page, up to 100,000 face information registration support. Enter personal information such as name, gender, age, etc. Click the “Browse” button to add face pictures, and then click the “Add Person” button to complete face registration. After successful registration, the relevant information will be displayed in the page table, as shown below:
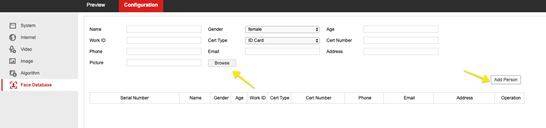
At the same time support in the WEB end of face information editing operations, such as the above page table “Operation” column, registration information can be edited, delete registration information, and face pictures management.
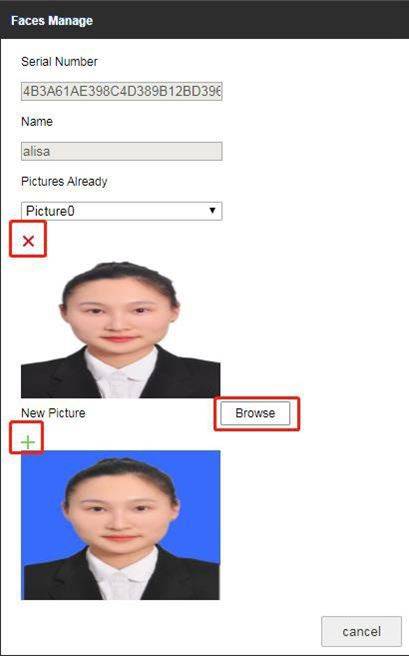
Manager face picture interface such as the following figure, you can select the face picture to be added by the “select” button at “new photos “, click the green “+” button to add; you can select the picture through the drop-down box at” existing photos “to view, and then click the red” x” button to delete the unwanted picture. After the operation is completed, click the “cancel” button to exit the administrator face picture interface.
Q4: How to set the person permission / prohibition to open the door (prompt authentication success)?
A4: There are two ways to allow/disallow people to open doors:
(1) Method 1: Add people to white/blacklists,
(2) Method 2: Set the permission group to add people to the corresponding permission group.
Add personnel to white/blacklist as needed, see “AITP04 user manual” document “blacklist and white list” section.
Q5: What are the requirements for a registered face?
A5:(a)Mobile phone shooting off camera beauty function, to ensure that the picture for the real face, no expression.
(b)The shooting background is solid color and other walls, the light is normal, avoid strong light, reverse light and other abnormal light.
(c)There is only one person in the picture, the front (face is not biased, both ears visible, the head is completely visible), shooting distance of about 1 meter, in the picture, the head of the person must have a head distance from the left and right upper three sides.
(d)face pixels more than 260(between the two ears), determine the face size can use the windows drawing software to open the face picture, drag a box on the face, will show the face size. Mobile phone shooting can be satisfied.
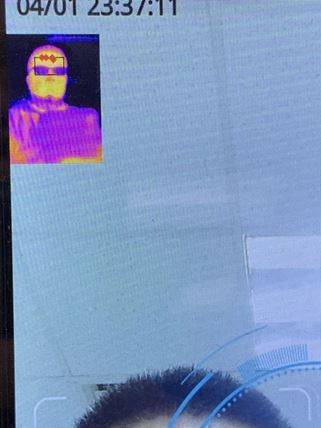
Effect Reference Figure:

Q6: How to open the mask detection (check if the person has a mask)?
A6:You can configure it ARFaceManager the tool or Web :
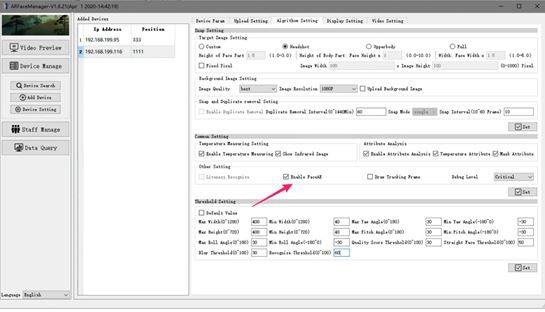
(1)Tool configuration:
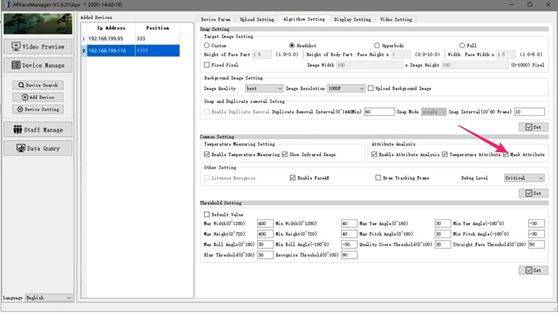
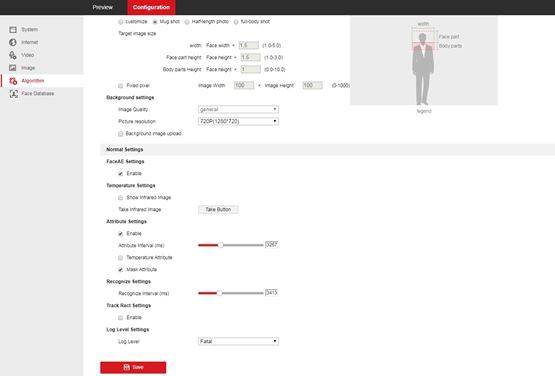
(2) Web side configuration: turn on the property analysis function by web “Configuration -> Algorithm – Capture Setting -Normal Settings-Attribute Settings”, as shown in the following figure:
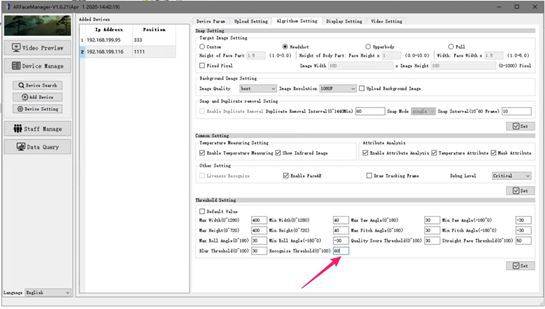
Q7: How to improve the recognition ratio of face with mask?
A7:(1) Tool configuration: set recognition threshold to 60(note: no more than 100 faces are recommended for registration at this time)
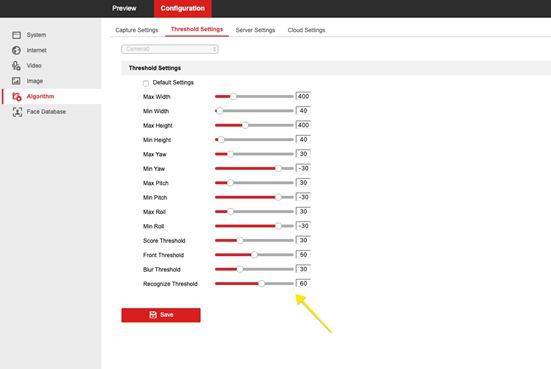
(2) Web end Configuration-Algorithm-Threshold Settings:
Q8: How to deal with the backlighting environment?
A8: Open the face ae function through the tool or web end, it will be exposed according to the area of the face.
(1) Tool side configuration:
(2) WEB end configuration:
Open the faceAE function by web “Configuration -> Algorrithm-> Capture Settings->Normal Settings->FaceAE Settings” as shown below:

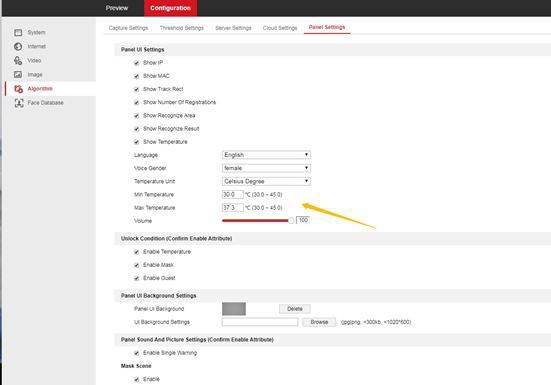
Q9: How to configure UI language and broadcast language types?
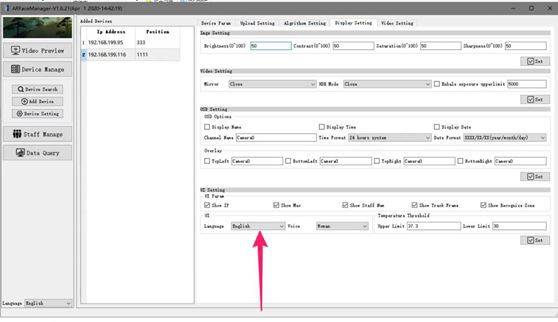
A9:UI support simplified Chinese, traditional Chinese, English, Japanese, Korean, Russian. can be switched by tool or web end.
(1) ARFaceManager tools
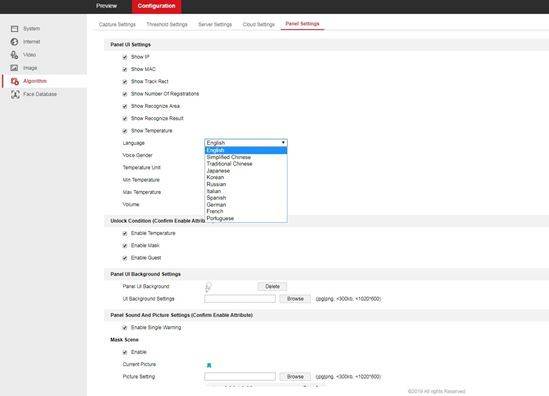
(2) Web-> Configuration -> Algorithm-> Panel Settings->Panel UI Settings:
Q10: How to modify the logo of UI?
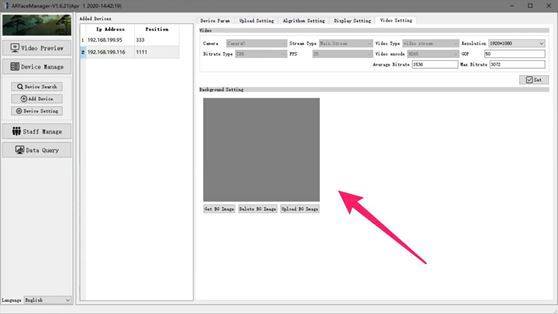
A10:(1) You can modify the logo and background by uploading the background map on the tool side.
Note: the imported background graph is in PNG format.
(2) Web-> Configuration -> Algorithm-> Panel Settings->Panel UI Background Settings:
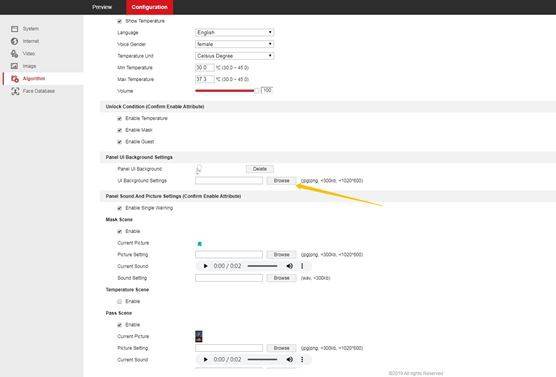
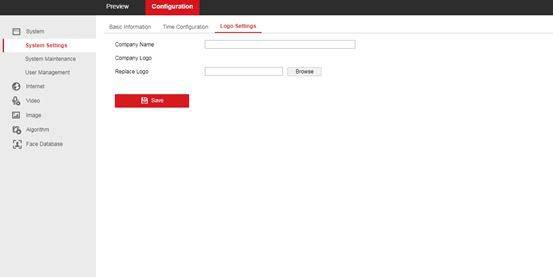
Q11. How to modify the logo of web interface?
A11:Logo use 120*90 resolution size png format picture, background is colorless.
Q12. How to modify the logo of ARFaceManager interface?
A12:(1)To build a res directory under the ARFaceManger tool peer directory.
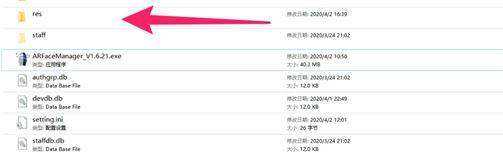
Q12: How to modify the logo of ARFaceManager interface? (1)To build a res directory under the ARFaceManger tool peer directory.
Q13: How to view the terminal firmware version?
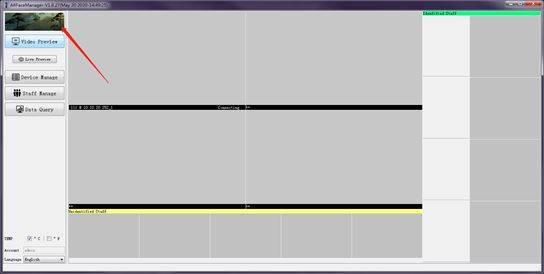
A13:You can look at web and ARFaceManager tools separately ARFaceManager tools:
ARFaceManager tools:
Web methods:
Viewed through the web “Configuration -> System -> System Settings -> Basic Information” page, the panel machine firmware is 33 versions as shown below:
Q14: How to transfer the image to the cloud? How do I connect to a cloud server?
A14: The panel machine supports both Http and Mqtt cloud connections and uploads images to user-defined clouds, Upload to the user custom cloud, the specific operation is as follows:
Through the web “Configuration -> Alogrithm -> Server Settings” page, setting up a Http or Mqtt Server, The format of Http is http://host-ip:5000/face-notify, for exampl e http://192.168.1.234:5000/face-notify;Mqtt is tcp://192.168.1.234:1883, if so Set up and save as below:
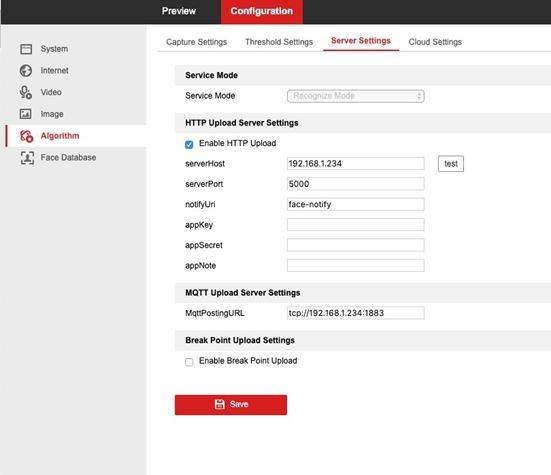
Among them:
a. serverHost is the IP address of the cloud server used to receive pictures uploaded by the camera.
serverPort is the port used by the cloud server to receive pictures uploaded by the camera. notifyUri is the Http service address used by the cloud server to receive pictures uploaded by the camera.
b.Http Server receive save image: image upload using JSON data format, python script example as follows:
c.Mqtt Client receive save image: need to build and enable first Mqtt Server, such as EMQ; and then use the python installation paho.mqtt.python; follow the following example script to subscribe to the message, receive and save the picture:
Upload to cool core private cloud:
Please refer to “cool core micro Linux panel machine falcon cloud landing and operation mode. Pdf ” documentation.
Q15: What if the temperature measurement accuracy of the temperature measuring panel machine is not accurate?
A15: Following the steps below:
(1) Is the black frame of the upper corner of the temperature measurement aligned to the forehead area?
(2) is the temperature measurement image clear?
(3) Is there any other heat source in the environment?
(4) Is it outside? or in the air conditioning port and other windy areas?
Q16: How to modify the range of human body temperature measurement and high temperature?
A16: Temperature caps and order thresholds can be modified through tools and web: Tool:
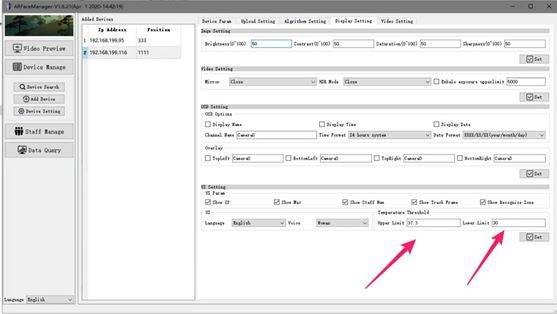
Web->Configuration->Algorithm->Panel Settings->Panel UI Settings:
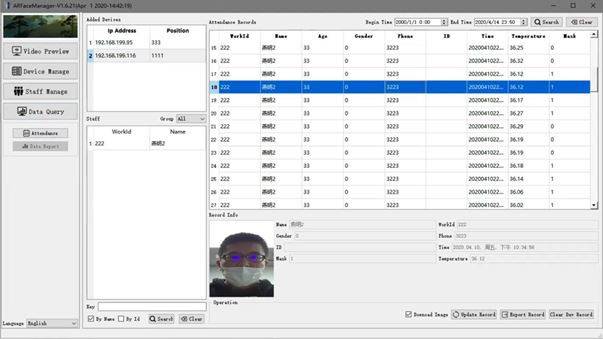
Q17: How to export face recognition records?
Q18: How to view rtsp stream video?
A18:The panel machine supports H265 single main stream output. There are two ways to view stream, web and vlc video stream player.
(1) For web information:
After login web, you can play video in the preview interface, the specific operation is as follows:
(a)The screen preview function requires the use of a 32-bit VLC plug-in, and the following interface will appear if the computer has not yet installed a 32-bit VLC,
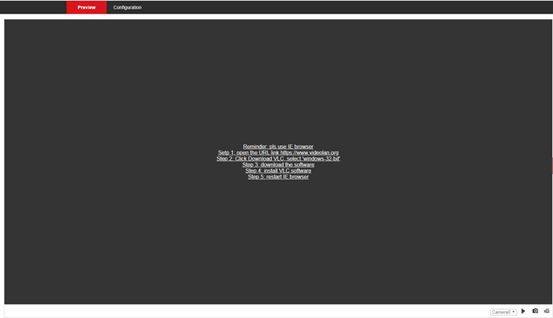
click on the link shown in the figure above, select the download Windows version in the open website. After the download is completed, close the browser, install, and re-open the IE, login web page after completion.
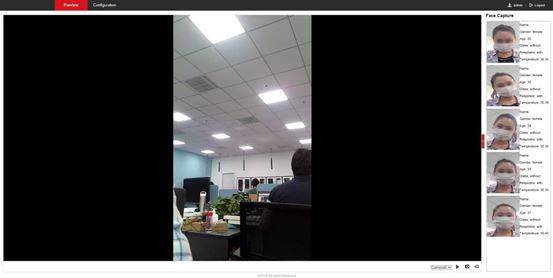
(b) Successful login will enter the screen preview interface, as shown below:
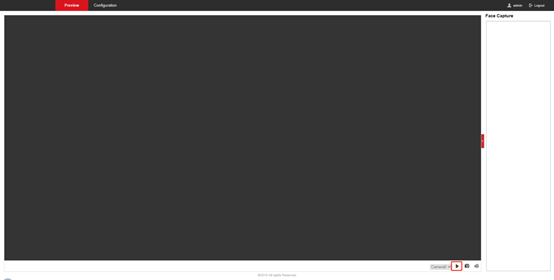
Click the play button in the red box in the lower right corner above to see the real-time picture of the camera.
If a prompt appears in the screen preview interface as shown below, click “Allow “.
If you still cannot preview the screen, you need to reset IE browser settings. click on the “Internet options -> advanced – reset” button, as shown below, tick “delete personal settings “,click” reset “, restart the computer after completion, and then re-log in web.
(2) The steps vlc opening the video stream are as follows:
(a). Open vlc software and select “Media -> Open Network Stream “, as shown below:

(b). Enter the camera rtsp stream address in the open interface edit box, taking the camera address 192.168.1.100 as an example, rtsp the stream address is rtsp://192.168.1.100, click the “play” button to start the video stream playback. As follows:
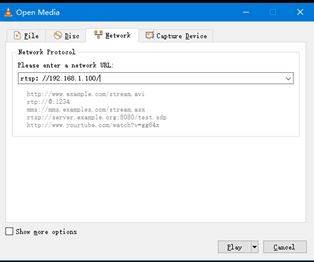
Note: The panel machine supports both RGB and infrared cameras. As mentioned above, the flow view mode of the RGB camera is rtsp://192.168.1.100/.
Note: when different clients connect to the same device in Wi-Fi mode, face data in the preview interface cannot be updated simultaneously.
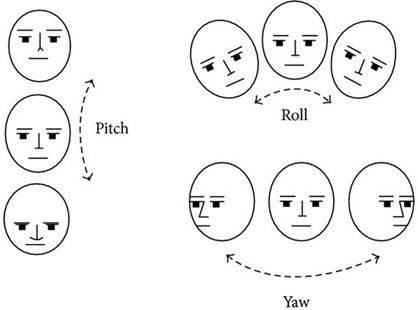
Q19. How to adjust the angle of face capture?
A19:(1). Setting interface
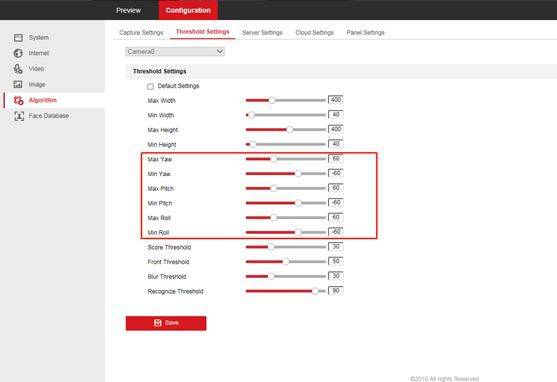
(2). Parameters explanation:
| Parameter | Explanation |
| Max width | The maximum width of face effective pixel; No snapshot is taken if face width is greater than this value. |
| Min width | The minimum width of face effective pixel; No snapshot is taken if face width is less than this value. |
| Max height | The maximum height of face effective pixel; No snapshot is taken if face height is greater than this value. |
| Min height | The minimum height of face effective pixel; No snapshot is taken if face height is less than this value. |
| Max yaw | Face maximum yaw angle; No snapshot is taken if face yaw is greater than this value. |
| Min yaw | Face minimum yaw angle; No snapshot is taken if face yaw is less than this value. |
| Max pitch | Face maximum pitch angle; No snapshot is taken if face pitch is greater than this value. |
| Min pitch | Face minimum pitch angle; No snapshot is taken if face pitch is less than this value. |
| Max roll | Face maximum roll angle; No snapshot is taken if face roll is greater than this value. |
| Min roll | Face minimum roll angle; No snapshot is taken if face roll is less than this value. |
| Score threshold | Face quality score. When face quality is poor, lower this value to reduce missed snapshot; When there are more false snapshots, increase this value to reducefalse snapshots. |
| Front threshold | Front face degree. Temporarily unused. |
| Blur threshold | Face blur degree. When face is unclear, increase this value to help reducemissed snapshots. |
| Recognize threshold | Face recognition score. When recognize rate is low, reduce this value to detect more face. |
Note: In common application scenarios, minimum values are -30, maximum values are 30, and it can meet the basic requirement. But if they are installed on the wall or some high place, we need to set minimum, maximum -60 and 60 for better face recognition.

-300x128.jpg)